Sessions and incidents
Firecrest treats two things as a "session" under the hood:
- Training sessions — scheduled training. Have a QR code that members scan to record attendance.
- Incidents — actual callouts. No QR code; you record attendance manually after the fact. Have extra fields for the incident number and type.
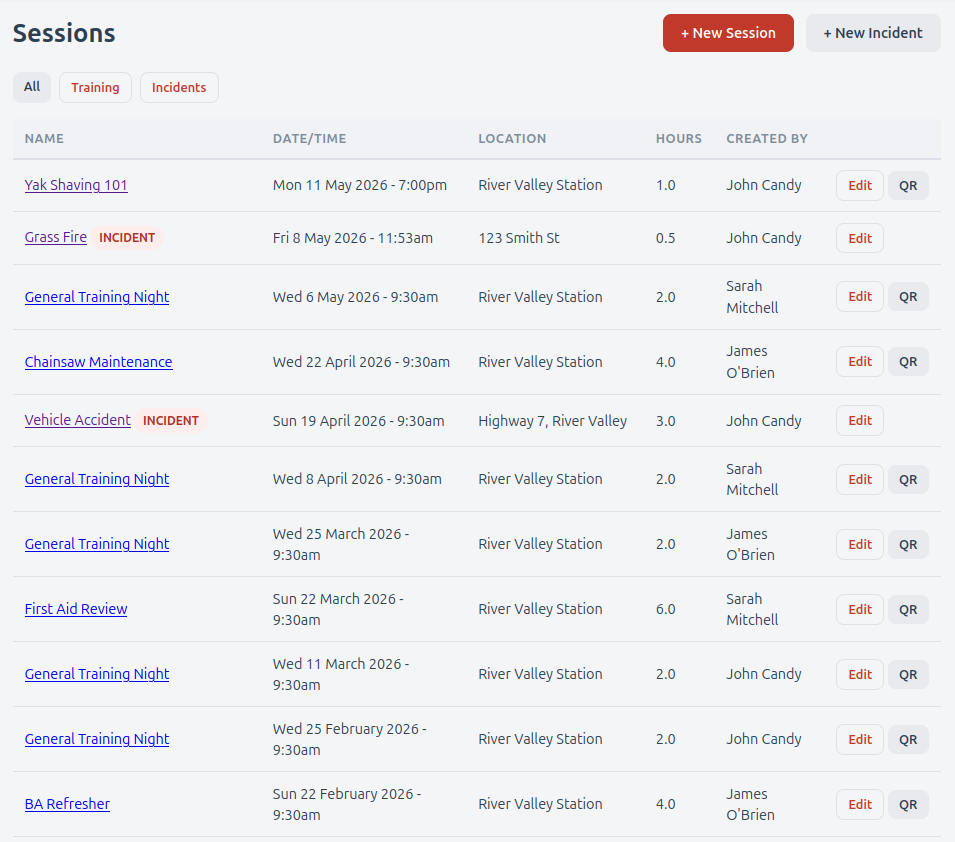
Both appear in the same Sessions list. Each row carries a small avatar — T for training, I for incidents — so you can tell them apart at a glance. A filter bar at the top lets you switch between All / Training / Incidents.
Creating a training session
From the Sessions page, click + New Session. Fill in:
- Session Name — e.g. Tuesday Drills — Pump Operations.
- Date & Time — when the session starts (interpreted in the department timezone).
- Location — free text, optional.
- Hours Credit — how many hours of training this counts for. This is what gets added to each attendee's logged hours for every linked SMP.
- Description — optional notes shown on the session page.
- Skills Maintenance Programs — tick every SMP this session should count toward. A session can credit multiple SMPs at once.
Click Create Session. You land on the session detail page, where you can:
- Click Show QR Code to open the printable QR page on a phone or display screen.
- Click Edit to change anything.
- Manually add attendance (see below).
- Attach photos (see below).
The detail page also displays Created By — the officer who first created the session — alongside the session metadata.
For training sessions, a Member Rating row appears under the QR-validity line. It shows the average star rating (out of 5) and the count of ratings submitted — e.g. "★ 4.3 / 5 (12 ratings)" — or "No ratings yet." if nobody has rated yet. Ratings are submitted by members from the success page after they scan; they're anonymous, so the rating doesn't tell you who rated, just the aggregate. Incidents don't get a rating prompt.
The QR code
Every training session has a randomly generated QR token, valid for 24 hours after the session start time.
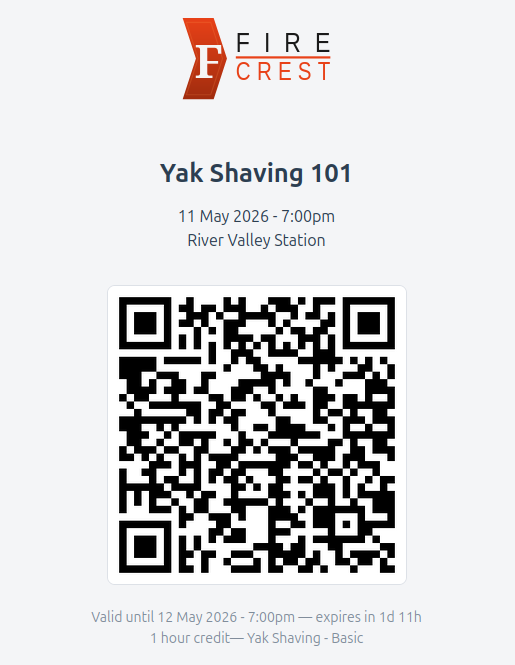
Open the QR page on a phone, tablet, or projector and let members scan it with their phone camera. The QR page shows:
- The session name, date and location
- The QR code itself
- The hours credit and which SMPs it counts toward
- The validity countdown (or Expired)
Adding attendance manually
From the session detail page, the Add Manual Attendance card lets you record a member's attendance without them scanning. Pick the member from the dropdown, add optional notes ("arrived late", "demonstrator"), and click Add.
The Notify member checkbox (on by default) sends the member an attendance confirmation email — handy because they have no scan-result page to confirm it worked for them.
Manually recorded attendance has Recorded By set to your officer name on the attendance table. Self-scanned attendance shows Self.
Photos
Sessions and incidents can have photos attached — drill action shots, incident documentation, training-equipment records, whatever's useful.
Scroll to the Photos card on the session detail page. To upload:
- Click Choose File and select a JPEG, PNG or WebP image.
- Click Upload Photo.
The new photo appears immediately in the photo grid, alongside the uploader's name and upload date.
Two upload paths:
- Officers can upload at any time from the session detail page.
- Members can attach a single photo when they scan the QR to record attendance — there's an optional Photo field on the attendance form alongside the feedback box.
Click any photo to open it full-size in a new tab. Click the × on a photo's corner to delete it (officer only; asks for confirmation; deletion is permanent).
If you don't see the Photos card
Photo storage is a per-installation feature. If your brigade's Firecrest doesn't have it set up, the Photos card is hidden entirely and member QR scans silently skip the photo step.
Recording an incident
Incidents work the same way as sessions but with a few different fields and no QR code.
From the Sessions page click + New Incident. Fill in:
- Description — short summary, e.g. MVA response, Assist Police. Required.
- Incident Number — optional, free text.
- Incident Type — optional, e.g. Road Crash Rescue, Structure Fire.
- Date & Time — when the incident happened.
- Location — free text, optional.
- Hours Credit — typically the actual time spent. Defaults to 0.5.
- Notes — optional.
- Skills Maintenance Programs — which SMPs the incident credits toward, if any.
Click Record Incident. Then add attendance manually as you would for a manually- attended training session.
Why no QR for incidents?
Incidents happen unplanned and are over before you would normally set up a QR display. The expected flow is: record the incident after the fact, then tick off who attended.
Editing or cancelling
Click Edit on any session/incident row, or on the session detail page.
There is no separate "cancel" or "delete" action exposed for sessions. To remove a session entirely, you would need to do it via direct database access — in practice, edit the name to mark it as cancelled and zero out its hours credit, or just leave it with no attendees.